Tuesday, August 30, 2011
Bleach vs One Piece v5.25 w3x | Download Bleach vs One Piece 5.25 w3x Map
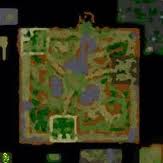
Bleach vs One Piece v5.25 w3x - Download Bleach vs One Piece 5.25 w3x Map. Want to play another map from Bleach? Yeah, now you can play Bleach vs One Piece v5.25 w3x.

Bleach vs One Piece v5.25 Features:
Map Name : Bleach vs One Piece v5.25
Category: Hero Arena
Tileset: Cityscape
Dimensions: 128×128
Playable Area: 125×113
Recommended Players: Full House
by Raven
Added New Heroes
Added New Items
Modes: -ar, -np, -hs, -ds, -nd, -n3, -n5, -ne, -ns, -nr, -fh, -sh, -nh, -sc, -bh, -nf, -nw, -bo, -oo, -so
Link Download: Bleach vs One Piece v5.25.w3x
Reborn vs Naruto v1.1b w3x | Download Reborn vs Naruto 1.1b w3x Map
Reborn vs Naruto v1.1b w3x - Download Reborn vs Naruto 1.1b w3x Map. Reborn vs Naruto v1.1b w3x one of custom map of DotA released by Nookaiser. There are many fixes has been made in this map. Now you can download this map below!
Reborn vs Naruto v1.1b w3x Features:
Map Name : Reborn Vs Naruto v1.1b
Category : Hero Defense
Tileset : Sunken Ruins
Dimensions : 160×160
Playable Area : 154×156
Recommended Players : 3 team +
Reborn vs Naruto v1.1b w3x changelogs:
- Aos 3 way 28 hero
- Fix any bug some character
- Fix balance hero
- Add some sound
Link Download: Reborn vs Naruto v1.1b
Monday, August 29, 2011
Reborn vs Naruto v1.2 w3x | Download Reborn vs Naruto 1.2 w3x Map
Reborn vs Naruto v1.2 w3x - Download Reborn vs Naruto 1.2 w3x Map. Are you looking for Reborn vs Naruto 1.2? Yeah, now you can play Reborn vs Naruto vs1.2.w3x on you computer. Hope you like this map... enjoy the game guys..

Reborn vs Naruto 1.2 w3x:
Map Name : Reborn Vs Naruto v1.2
Category : Hero Defense
Dimensions : 160×160
Playable Area : 154×156
Recommended Players : 3 team +
Link Download: Reborn Vs Naruto v1.2.w3x
Bleach vs One Piece v5.26 w3x | Download Bleach vs One Piece BvO v5.26.w3x Map
Bleach vs One Piece v5.26 w3x - Download Bleach vs One Piece BvO v5.26.w3x Map. Bleach vs One Piece v5.26 w3x is another map from Bleach vs One Piece. Now you must play this map, because this map is veri insteresting to play.

Bleach vs One Viece 5.26 w3x features:
————————————–
Category: Hero Arena
Tileset: Cityscape
Dimensions: 128×128
Playable Area: 125×113
Recommended Players: Full House
Added New Heroes
Added New Items
Modes: -ar, -np, -hs, -ds, -nd, -n3, -n5, -ne, -ns, -nr, -fh, -sh, -nh, -sc, -bh, -nf, -nw, -bo, -oo, -so
Link Download: Bleach vs One Viece 5.26 w3x
Bleach vs One Piece v3.0b w3x | Download Bleach vs One Piece BvO 3.0b.w3x Map
Bleach vs One Piece v3.0b w3x - Download Bleach vs One Piece BvO 3.0b.w3x Map. Yeah, this is another map from Bleach vs One Piece v3.0b.w3x. As we know Bleach vs One Piece is one of most popular game Anime in Japan. Want to tray to play this map? Yes, let's play the game!

Bleach vs One Viece v3.0b.w3x features:
===========================
Category: Role Playing (RPG)
Tileset: Cityscape
Dimensions: 128×128
Playable Area: 125×113
Recommended Players: Full House
Modes: -ar, -np, -hs, -ds, -nd, -n3, -n5, -ne, -ns, -nr, -fh, -sh, -nh, -sc, -bh, -nf, -nw, -bo, -oo, -so
Link Download: Bleach vs One Viece v3.0b.w3x
Bleach vs One Piece v6.25 w3x | Download Bleach vs One Piece 6.25.w3x Map
Bleach vs One Piece v6.25 w3x - Download Bleach vs One Piece 6.25.w3x Map. Bleach vs One Viece 6.25.w3x is one of most popular game Anime in Japan. Want to play another map from Bleach? Yeah, now you can play map Bleach cs One Piece 6.25.w3x.

Bleach vs One Viece v6.25.w3x features:
Category : Hero Arena
Tileset : Cityscape
Dimensions : 128×128
Playable Area : 125×113
Recommended Players : Full House
Added New Heroes
Added New Items
Modes: -ar, -np, -hs, -ds, -nd, -n3, -n5, -ne, -ns, -nr, -fh, -sh, -nh, -sc, -bh, -nf, -nw, -bo, -oo, -so
Link Download: Bleach vs One Pieces v6.25.w3x
Sunday, August 28, 2011
Ish'Kafel Item Build | DotA The Dark Seer Item Build, Guide and Strategy
Ish'Kafel Item Build - DotA The Dark Seer Item Build, Guide and Strategy. Thought by some to be one of the most cunning and manipulative between champion varied Scourge, the seers Ish’kafel dark, living in exile from his people, also the most secret, because he spoke to anyone except the Lich King himself. His unconventional talents, which lie in enlarging itself and its allies with a variety of castings to support both defensive and offensive, very unusual and versatile, often capable of changing the wave of battle even before it begins.

Ish’kafel – Dark Seer
Range: 125 | Move Speed: 305
Primary: INT
Str: 22 + 3.2 | Agi: 12 + 1.2 | Int: 29 + 7.2
Damage: 60-66 | HP: 568 | Mana: 377
HP Regen: 0.91 | Mana Regen: 1:17
Attack Speed: 0.66 | Armor: 6
Vacuum (C)
Creating a gap on the parameters chosen, interesting and destroy the enemy in the area.
Level 10-40 Damage.
Level 20-80 Damage.
Level 3-120 damage.
Level 4-160 damage.
• Damage type: magic
• This capability will disrupt channeling spells and items.
• Drags unit for 0.3 seconds.
• Casting range: 550
• Area of ??Effect: 300/400/500/600
Mana Cost: 100/130/160/190
Rest: 16
Ion Shell (E)
Surrounds the target with a mantra of energy, creating a shield that causes damage per second to enemy units who come in contact with it. Lasts 15 seconds.
Level 1-30 damage per second.
Level 2-45 damage per second.
Level 3-60 damage per second.
Level 4-75 damage per second.
• Damage type: magic
• Do not damage the target was thrown on.
• Damage covered in smaller amounts every second of 0.1.
• If cast on a unit that already has Ion Shell on it, the new Ion Shell will replace the old
• Casting range: 600
• Area of ??Effect: 250
Mana Cost: 70/90/110/130
Rest: 7
Surge (R)
Floods a target with excess power giving the maximum speed for a short time.
Level 1 – Lasts 3 seconds.
Level 2 – Lasts 4.5 seconds.
Level 3 – Lasts 6 seconds.
Level 4 – Lasts 7.5 seconds.
• Casting range: 600
Mana Cost: 20/30/40/50
Cooldown: 12/11/10/9
Wall of Replica (W)
Increasing the wall where the pure out across the landscape. enemy heroes who tried to pass it will damage and have pictures of themselves emerge from the wall to serve under the Dark Seer until the duration of the wall was gone.
Level 1 – Creating Illusions Hero Wall which produce, lasts 15 seconds.
Level 2 – Creating Illusions Hero Wall which produce, lasts 30 seconds.
Level 3 – Creating Illusions Hero Wall which produce, lasts 45 seconds.
Mana Cost: 200/300/400
Rest: 100
• Damage type: magic
• When the walls create an illusion, it deals 150 damage to heroes affected.
• Do not create the illusion of an ally, another illusion, or a copy of the geomancer.
• Images are made by the Wall of Replica take 250% damage and deal 70%.
• Walls are made perpendicular to the line between Dark Seer and the target point.
• Wall Length: 1000
• Cast Range: 500/900/1300
Krobelus Item Build | DotA Death Prophet Item Build, Guide and Strategy
Krobelus Item Build - DotA Death Prophet Item Build, Guide and Strategy. Krobelus spend a day living as a strong member of the cult of Death Sayers. His belief in the way of death and the perfect harmony it brings the spirit of death has given him the opportunity to wreak havoc among the chaotic living. He uses his ability to call a meat-eating bats and long dead spirits to lay to rest all who still pump blood through their veins. She adds strength through the use of magic, and he was able to make opponents gape in fear, losing the focus needed to cast spells. He was faithful until death in all aspects of it, and would see all turned into ashes.

Krobelus – The Death Prophet
Range: 600 | Move Speed: 285
Primary: INT
Str: 19 + 2.2 | Agi: 14 + 1.4 | Int: 20 + 3
Damage: 44-56 | HP: 511 | Mana: 260
HP Regen: 0.82 | Mana Regen: 0.81
Attack Speed: 0.67 | Armor: 1
Carrion Swarm (R)
Sending a bunch of bats to damage enemies.
Level 1 – 100 damage per unit.
Level 2-175 damage per unit.
Level 3-250 damage per unit.
Level 4-300 damage per unit.
• Damage type: magic
• Casting range: 600
• Area of ??Effect: 110 (aoe Start) / 700 (Distance) / 300 (aoe Final)
Mana Cost: 105/120/140/165
Rest: 8
Silence (E)
Stop all enemies in target area from casting spells.
Level 1 – silence the unit in the target area, lasts 3 seconds.
Level 2 – silence the unit in the target area, lasts 4 seconds.
Level 3 – silence the unit in the target area, lasting 5 seconds.
Level 4 – silence the unit in the target area, lasting 6 seconds.
• Target can still use items while silenced
• Casting range: 900
Area Effect: 200/275/350/350
Mana Cost: 80
Rest: 14
Witchcraft (C)
Increasing the potential of each spell Krobelus’ and give a boost the speed of passive movement.
Level 1 – Increase spell, increase the velocity of 3%.
Level 2 – Enhance the spell, increase the velocity of 6%.
Level 3 – Increases spell, increases movement speed by 9%.
Level 4 – Increases spell, increases movement speed by 12%.
• Reduce costs by Carrion Swarm Where 5/10/15/20 and cooldown by 1/2/3/4 second.
• Reduce the cost of Silence where the 0/10/20/30 and cooldown by 0/1/2/3.
• Increase the number of level 1 spirit Exorcism by 1/2/3/4.
• Increase the number of level 2 spirit Exorcism by 1/3/4/6.
• Increase the number of level 3 spirit Exorcism by 0/2/4/7.
Mana Cost: N / A
Rest: N / A
Exorcism (X)
Removing the evil spirits to attack your enemy. For 30 seconds.
Level 1 – Speed ??5 evil spirits.
Level 2 – Speed ??10 evil spirits.
Level 3-16 Speed ??demons.
Mana Cost: 200/300/400
Rest: 100 Seconds
Spirits • perform 43-48 hero type damage.
• 700 Area of ??Effect set Krobelus area around where the spirit will choose a new target.
• If the spirit gets 2000 range or more than Krobelus, it will be destroyed.
• After the spell ends, the spirit will heal Krobelus to 25% of damage dealt by them.
Darchrow Item Build | DotA Enigma Item Build, Guide and Strategy
Darchrow Item Build - DotA Enigma Item Build, Guide and Strategy. The result of collapsing star is buried in the field of elemental magic, Darchrow is one of the most dangerous creature in existence, consuming hundreds of the world into the void of hate and hunger. He’s not above using his own allies as portals for employees themselves to come through. Capable of manipulating both void and shadow in combat, the greatest pleasure is to release the oblivion within him upon the world, creating a gap that draw the enemy closer to destruction.

Darchrow – Enigma
Range: 500 | Move Speed: 300
Primary: INT
Str: 17 + 01/02 | Agi: 14 + 1.0 | Int: 20 + 4.3
Damage: 42-48 | HP: 473 | Mana: 260
HP Regen: 0.76 | Mana Regen: 0.81
Attack Speed: 0.67 | Armor: 4
Malefice (F)
Focus Darchow `s hatred on a target, causing it to take damage over time and become repeatedly stunned.
Level 1-30 damage every 2 seconds, lasts 2 seconds.
Level 2-40 damage every 2 seconds, lasts 4 seconds.
Level 3-65 damage every 2 seconds, lasts 4 seconds.
Level 4-80 damage every 2 seconds, lasting 6 seconds.
• Damage type: magic
• The stuns will only apply if the target visible, contrary to the damage that is still handled.
• Casting range: 600
Mana Cost: 110/130/150/160
Rest: 15 seconds
Conversion demons (C)
Splitting an evil seeping into 3 aspects of itself, coming under your control. Lasts 35 seconds.
Level 1 – grow 3 Eidolons Lesser.
Level 2 – led to three Eidolons.
Level 3 – grow 3 Eidolons Kingdom.
Level 4 – grow 3 Eidolons Dire.
• convert the enemy unit will give you the gift of gold and experience.
• Eidolons will breed when they have been attacked 6 times. When this happens to their health restored.
• Casting range: 700
Mana Cost: 170
Rest: 35 seconds
Midnight Pulse (D)
Steeps area in dark magic, causing all opponents who dare enter to take damage. Lasts 8 seconds.
Level 1 – 3% max life lost per second.
Level 2 – 4% max life lost per second.
Level 3 – 5% max life lost per second.
Level 4 – 6% max life lost per second.
• Damage type: magic
• Damage through magic immunity.
• Destroys trees in its territory.
• Casting range: 500
• Area of ??Effect: 400
Mana Cost: 95/110/125/140
Rest: 25 seconds
Black Hole (B)
Call of power from the darkest abyss, creating a vortex that sucks all nearby enemies closer, dealing damage. Lasts 4 seconds.
Level 10-30 damage range, 60 damage close.
Level 20-50 damage range, 100 damage close.
Level 30-70 damage range, 140 damage close.
Mana Cost: 200/300/400
Cooldown: 200/190/180 seconds
• Damage type: magic
• Casting range: 250
• Area of ??Effect: 400 Pull aoe / 500 Far AoE Damage / 150 Close aoe damage
• Turn off the work on magic immune units.
• Turn off all enemies caught.
Saturday, August 27, 2011
Kel'thuzad Item Build | DotA Lich Item Build, Guide and Strategy
Kel'thuzad Item Build - DotA Lich Item Build, Guide and Strategy. Forced raised from the dead by the Lich King to serve as an elite magical guard, the Lich has a cold combustion control Northrend in his country. Generating blast freezing of many, his talent in life still remains in death. Exploring the essence of cool magic, he has the power to cause ice to condense into a ball which bounces from enemy to enemy, causing tremendous pain in the rear. Sacrificing his allies for magical power, the Lich is a murderer without a trace of warmth.

Kel `Thuzad – The Lich
Range: 550 | Move Speed: 315
Primary: INT
Str: 18 + 1:55 | Agi: 15 + 2.0 | Int: 18 + 3.25
Damage: 42-51 | HP: 492 | Mana: 234
HP Regen: 0.79 | Mana Regen: 0.73
Attack Speed: 0.68 | Armor: 1
Frost Nova (V)
The blast enemy units around a target enemy unit with a wave of snow damage that slows movement and attack rates for 4 seconds.
Level 1 – Deals 50 with damage to the target and 75 damage aoe.
Level 2 – Deals 100 with target damage and 100 damage aoe.
Level 3 – Deals 150 with a target damage and 125 damage aoe.
Level 4 – Deals 200 with target damage and 150 damage aoe.
• Damage type: magic
• Frost slows movement speed by 30% and attack speed by 20%.
• Casting range: 600
• Area of ??Effect: 200
Mana Cost: 125/150/170/190
Rest: 9.25/9.25/9.25/8 seconds
Frost Armor (F)
Make frozen shield around the target friendly unit. Shield adds armor and slows attacking units at close range for 2 seconds. Lasts for 40 seconds.
Level 1 – Adds 3 armor.
Level 2 – Adds 5 armor.
Level 3 – Adds 7 armor.
Level 4 – Adds 9 armor.
• Frost slows movement speed by 30% and attack speed by 20%.
• If the trigger is activated, the Lich will cast this spell on an ally that was attacked nearby.
• Casting range: 800
Mana Cost: 50
Rest: 5 seconds
Dark Ritual (D)
Sacrifices a target friendly unit to change the points that hit where.
Level 1 – Converts 15% of HP’s current spread to where.
Level 2 – Converts 30% of HP’s current spread to where.
Level 3 – Convert 45% of HP’s current spread to where.
Level 4 – Converts 60% of HP’s current spread to where.
• The enemy heroes do not gain experience from creeps killed with Dark Ritual.
Casting range: 400
Mana Cost: 25
Cooldown: 30/27/24/21 seconds
Chain Frost (C)
Releasing a breath of snow jump jumps 7 times.
Level 1 – Deals 280 (370 *) damage per jump.
Level 2 – Deals 370 (460 *) damage per jump.
Level 3 – Deals 460 (550 *) damage per jump.
Mana Cost: 200/325/500
Cooldown: 145/115/60
• Damage type: magic
• Frost slows movement speed by 30% and attack speed by 20%.
• The first target of this skill is ministuned.
• Casting range: 750 (850 *)
• Bounce Distance: 600
• Can be upgraded with a stick Aghanim’s (* indicates the value added).
Rotund'jere Item Build | DotA Necrolyte Item Build, Guide and Strategy
Rotund'jere Item Build - DotA Necrolyte Item Build, Guide and Strategy. Murdered for the sins of heresy by those who declared themselves holy, death only gifted Rotund’Jere with great wrath to live, that he can express by sending evil spirits at his enemy. Take pleasure and growing more powerful each time living dead by hand, every step of the smell of death, and his presence makes living things rot and wither. Now the master of torture and pain, Necrolyte mercilessly slays any weakness that might cross the street, always with a smile on the face of evil is dead.

Rotund’jere – Necrolyte
Range: 550 | Move Speed: 290
Primary: INT
Str: 16 + 2.0 | Agi: 15 + 1.7 | Int: 22 + 2.5
Damage: 44-48 | HP: 454 | Mana: 286
HP Regen: 0.73 | Mana Regen: 0.89
Attack Speed: 0.68 | Armor: 1
Death Pulse (D)
The Necrolyte unleashing a wave of death from the nucleus itself, dealing damage to enemies and healing allies.
Level 1 – Deals 75 damage and heal 50 HP.
Level 2 – Deals 125 damage and heal 75 HP.
Level 3 – Deals 200 damage and heals 100 HP.
Level 4 – Deals 275 damage and heals 130 HP.
• Damage type: magic
• Pulse deaths can not be avoided by moving or flashing.
• Can cure magic immune units.
• Area of ??Effect: 400/450/475/500
Mana Cost: 125/145/165/185
Cooldown: 8/7/6/5
Heartstopper Aura (T)
Air deadly heart stills his opponents, causing them to lose the percentage of their max health over time.
Level 1 – Deals 0.4% of max HP from the target per second.
Level 2 – Deals 0.6% of max HP from the target per second.
Level 3 – Deals 0.8% of max HP from the target per second.
Level 4 – Deals 1.0% of max HP from the target per second.
• The damage type: HP removal
• Damage to regeneration is considered as negative, and the ability so it does not disable or items such as kelen’s Dagger that requires the player based damage.
• Area of ??Effect: 1000
Mana Cost: N / A
Rest: N / A
Sadistic (I)
Reveling in death and illness, which gains Necrolyte back to kill the unit.
Level 1-12 get back where.
Level 2 – get back 24 where.
Level 3-36 get back where.
Level 4 – get back 48 where.
• sadist is also triggered by the denial.
Mana Cost: N / A
Rest: N / A
Reaper` s Scythe (R)
Bringing the target to full realization of his own mortality, dealing damage based on how much the target of life lost. Stuns for 1.5 seconds.
Level 1 – Deals 0.4 (0.6 *) damage per hit point loss and stuns.
Level 2 – Deals 0.6 (0.9 *) damage per hit point loss and stuns.
Level 3 – Deals 0.9 (1.2 *) damage per hit point loss and stuns.
Mana Cost: 175 (150) / 340 / 500
Cooldown: 100/85/70 (70 at all levels with a stick)
• Damage type: magic
• Turn off the work on magic immune units.
• Casting range: 600
• Can be upgraded with a stick Aghanim’s (* indicates the value added).
Pugna Item Build | DotA Oblivion Item Build, Guide and Strategy
Pugna Item Build - DotA Oblivion Item Build, Guide and Strategy. Forced raised from the dead with little memory of a former self, Pugna really a terrible sight to behold. Retain traces of necromantic magic, this shamble of bone finds sadistic pleasure in temporarily sending the enemy into tormented dimension and greeting their return with the explosion of pure energy. Those who survived the encounter with the horror often afraid to tell with my eyes how the Oblivion literally drains life from his enemies, gave a brief, but satisfying, taste of life.

Pugna – The Oblivion
Range: 600 | Move Speed: 315
Primary: INT
Str: 17 + 01/02 | Agi: 16 + 1 | Int: 26 + 4
Damage: 45 – 53 | HP: 473 | Mana: 338
HP Regen: 0.76 | Mana Regen: 1.05
Attack Speed: 0.68 | Armor: 1
Nether Blast (B)
Creating a blast exploding pulses from Dutch Plane, dealing damage to units and buildings.
Level 1 – Deals 100 Damage (40 to the structure).
Level 2 – Deals 175 Damage (60 to the structure).
Level 3 – Deals 250 Damage (80 to the structure).
Level 4 – Deals 325 damage (100 structures).
• Damage type: magic
• Effect delayed 0.5 seconds.
• Casting range: 400
• Area of ??Effect: 400
Mana Cost: 85/105/125/145
Rest: 5.5
Decrepify (C)
Pugna cast strong magic cast on the unit. This unit was sent to a smooth plane for a small period, reducing movement speed by 50% and rendering it unable to attack. It takes 44% extra damage from spells.
Level 1 – Affected units take 44% additional damage from spells, lasts 2 seconds.
Level 2 – Affected units take 44% additional damage from spells, lasts 2.5 seconds.
Level 3 – Affected units take 44% additional damage from spells, lasts 3 seconds.
Level 4 – Affected units take 44% additional damage from spells, lasts 3.5 seconds.
damage • Only pure magic and can endanger the unit under the influence Decrepify.
• Scream of Pain, Echo Slam, and Heat Seeking Missile Decrepified will not damage the target, although they deal magical damage.
• Casting range: 550
Mana Cost: 100
Cooldown: 13/11/9/7 seconds
Nether Ward (W)
Call a Dutch Ward that prevents enemy heroes from regenerating where and can cast Mana Flare, which deals damage to enemy heroes as they cast spells. Lasts 25 seconds. Each level increases the effect of broad Ward Mana Flare, Mana Flare damage, where the negative and hp regen from the environment.
Level 1 – Ward has 75 HP, -1.5 Mana regeneration to the enemy, Mana Flare transaction Mana 0.75 per point of damage.
Level 2 – Ward has 150 HP, -3.0 Mana regeneration to the enemy, Mana Flare transaction Mana 1.00 per point of damage.
Level 3 – Ward has 225 HP, -4.5 Mana regeneration to the enemy, Mana Flare transaction Mana 1.25 per point of damage.
Level 4 – Ward has 300 HP, -6.0 Mana regeneration to the enemy, Mana Flare 1.50 transactions per point of damage Mana.
• Damage type: magic
• Mana Flare is triggered when the enemies cast spells and damage based on where the cost of the spell.
• Mana Flare damage transaction prior to actually cast spells, so if the target dies the spell has no effect.
• Area of ??Effect: 700/1000/1300/1600
Mana Cost: 80
Rest: 35 seconds
Life Drain (D)
Pugna calls drying very strong magic that absorbs the life essence of an enemy unit. Lasts 9 seconds.
Level 1 – channel 95 (150 *) HP per second.
Level 2 – channel 140 (200 *) HP per second.
Level 3 – channel 185 (250 *) HP per second.
Mana Cost: 125/175/225
REST: 22 (0 *) seconds
• Damage type: magic
• Life Drain is a channeling spell.
• HP dried depending on the actual damage dealt, so Decrepify increases and reductions to reduce the spell.
• Do continue to drain over the target remains within the range of 850 from Pugna.
• If the target is the illusion was shattered on the first tick of damage.
• Casting range: 850
• Can be upgraded with a stick Aghanim’s (* indicates the value added).
Harbinger Item Build | Dota Obsidian Destroyer Item Build, Guide and Strategy
Harbinger Item Build - Dota Obsidian Destroyer Item Build, Guide and Strategy. An obsidian construct brought to life through the ill conceived necromancy of the Lich King, Harbinger really need magic to make up for the emptiness brought on by nature incomplete calls. Ironically, however, to devour the magic that so desires, Harbinger must tap into the pool itself which time and time again, spending to the point where it ends with even less than it started with. However, despite this, the Obsidian Destroyer is a proud servant of the Undead Scourge, and takes great pleasure in meeting eradicate the stupid Sentinel through psionic exploitation.

Harbinger – Obsidian Destroyer
Range: 450 | Move Speed: 300
Primary: INT
Str: 19 + 1.85 | Agi: 24 + 2.0 | Int: 26 + 8.2
Damage: 49-64 | HP: 511 | Mana: 338
HP Regen: 0.82 | Mana Regen: 1.05
Attack Speed: 0.73 | Armor: 4
Arcane Orb (R)
Provides extra strength Destroyer to destroy its enemies by the pool where the remains. Damage type is pure.
Level 1 – Deals 6% of which now remain. Deals 100 bonus damage to illusions and summoned units.
Level 2 – Deals 7% of which now remain. Deals 200 bonus damage to illusions and summoned units.
Level 3 – Deals 8% of which now remain. Deals 300 bonus damage to illusions and summoned units.
Level 4 – Deals 9% of which now remain. Deals 400 bonus damage to illusions and summoned units.
• Damage type: pure
• The damage is calculated after which the fee is spent.
• Do not stack with the effects of the ball and placers fans.
• Casting range: 450
Mana Cost: 100
Rest: 0 Seconds
Detention Astral (T)
Teleports target allied or enemy hero into an astral prison. heroes remain separate from the real world for a spell. If thrown at an enemy, Harbinger steals intelligence from the target. Intelligence restored became a hero after 60 seconds.
Level 1 – removed for 1 second. 2 Int exchange.
Level 2 – banished for 2 seconds. 4 Int exchange.
Level 3 – removed for 3 seconds. 6 Int exchange.
Level 4 – thrown for 4 seconds. 8 Int exchange.
• When cast on allies, no intelligence was stolen and the vision is not removed.
• Jailed hidden units and are immune, but not lose their vision of the surrounding area.
• Casting range: 550
Mana Cost: 120/140/160/180
Cooldown: 18/16/14/12
Essence Aura (E)
Every time a nearby allied hero cast a spell, he has a chance to restore a portion of the pool where her. Passive add to the pool where the destroyer base.
Level 1-10% chance to recover. Increasing the basis where by 75.
Level 2 – 20% chance to recover. Increasing the basis where by 150.
Level 3 – 30% chance to recover. Increasing the basis where by 225.
Level 4-40% chance to recover. Increasing the basis where by 300.
• When autocasting Arcane Orb, a chance to recover which was reduced to 5% / 10% / 15% / 20%.
• If Arcane Orb is cast this manual has a 10% regular / 20% / 30% / 40% chance for restoration where.
• Some skills without a cooldown (like the Spirit of the Storm’s Ball Lightning) and toggle spells (such as a Voodoo Witch Doctor Restoration) can not trigger Essence Aura.
• Area of ??Effect: 1000
Mana Cost: N / A
Rest: N / A
Sanity Eclipse (C)
The Obsidian Destroyer released their full potential; mind releasing psionic storm able to penetrate lesser minds with terminal force, dealing massive damage to them. More crafty minds are able to hold most of the damage, but they spend most of their energy to do so, losing 75% from where they are. Heroes with more intelligence than the Destroyer are unaffected.
Level 1 – Deals damage by 8x (9x *) difference between the heroes intelligence and Destroyer’s intelligence.
Level 2 – Deals damage by 9x (10x *) difference between the heroes intelligence and Destroyer’s intelligence.
Level 3 – Deals damage by 10x (11x *) difference between the heroes intelligence and Destroyer’s intelligence.
Mana Cost: 175/250/325
Rest: 160
• Damage type: magic
• Does not affect the unit under the influence of Astral Imprisonment.
• If the enemy hero Less than 80/270/500 damage (at level 1/2/3), he will lose 75% of which at this time.
• Casting range: 600/650/700
• Area of ??Effect: 400/500/600 (700/750/800 *)
• Aghanim’s stick to increase the reach of the damage and casting
Friday, August 26, 2011
DOTA IMBA MODE COMMANDS
All mode dota imba:
-ar: All Random
-rs: Random Skill
-dm: Death Match
-nd: No Deathtime
-fn: Fast Neutral respawn
-fr: Fast Respawn
-st: Super Towers-sl: Every hero loses one skill (including stats).
-fe: Roshan and forest creeps randomly drop items on death.
-fn: Neutrals spawn every 30 seconds instead of 60 seconds.
-ss: Every hero loses their original skills and gains 4 random skills like in OMG or LOD.
-ak: Every hero gains one random skill.
-rb: 8 random heroes are banned
-cc: Creeps are able to become hero AIs (last hit, deny, avoid tower, level up, change lanes).
-ce: Every hero gets increased movement speed, regeneration, damage, and all bonuses from the fountain.
-sa: Every hero starts with random stats and stat gains.
-bb: Hitting towers with no enemy creeps nearby will make the tower invincible
-ca: Able to attack your teammates. AIs attack themselves in fountain straight off. You are also able to get First Blood and experience by killing allies.
-ar: All Random
-rs: Random Skill
-dm: Death Match
-nd: No Deathtime
-fn: Fast Neutral respawn
-fr: Fast Respawn
-st: Super Towers
-fe: Roshan and forest creeps randomly drop items on death.
-fn: Neutrals spawn every 30 seconds instead of 60 seconds.
-ss: Every hero loses their original skills and gains 4 random skills like in OMG or LOD.
-ak: Every hero gains one random skill.
-rb: 8 random heroes are banned
-cc: Creeps are able to become hero AIs (last hit, deny, avoid tower, level up, change lanes).
-ce: Every hero gets increased movement speed, regeneration, damage, and all bonuses from the fountain.
-sa: Every hero starts with random stats and stat gains.
-bb: Hitting towers with no enemy creeps nearby will make the tower invincible
-ca: Able to attack your teammates. AIs attack themselves in fountain straight off. You are also able to get First Blood and experience by killing allies.
-ox: Spawns the Onyxia, the boss of imba, in the center of the map.
-ay: Both teams share vision and everyone gets 9999999 gold
-id: drop one item when hero dies
-pm: able to use all items although they’re not yours
-mc: Modified super creeps
-ay: Both teams share vision and everyone gets 9999999 gold
-id: drop one item when hero dies
-pm: able to use all items although they’re not yours
-ach: This command is used to query all the achievements you have received.
-re: adding an optional hero: mountains of meat (itself only has a “man child domineering waves,” a skill.) -mc: Modified super creeps
Wednesday, August 24, 2011
Tuesday, August 23, 2011
Monday, August 22, 2011
Dota 2 Wallpaper | Kunkka Wallpaper Dota 2
Dota 2 Wallpaper - Kunkka Wallpaper Dota 2 - Dota 2 heroes Artwork. DOTA 2 wallpaper art of 5v5 battle between Dire and Radiant (Sentinel & Soucrge). It shows the first impression of many DOTA 2 heroes and they are looking incredible.

You can see Lina, Rylai, Tiny, Yurnero and Sven. Meanwhile, from the Scourge (Dire) we could see Nevermore (or Slardar?), Tidehunter, Razor, Faceless Void and Viper. After this update by Kunkka it is pretty much clear that not only IceFrog was working with Valve but there were many renowned people from the community who were involved in this project. Hope you like Dota 2 wallpaper.
Dota 2 Sign Up | How to Sign Up Dota 2 Beta
Dota 2 Sign Up - How to Sign Up Dota 2 Beta. Having trouble to sign up dota 2 Beta? Yes, now you can applyng the Dota 2 version.

You can follow steps below for Sign Up DOTA 2 Beta
1. You must Register for a Steam account in HERE
2. You must Login to DOTA 2 Steam website in HERE
3. Click Get on the list
4. Done!
If your account creation request failed, please try again later. message? It seems the Steam site is overloaded and try to register again next hours. Let's sign up our account now! good luck!
Miércoles Part 1, Dota 2
Miércoles, 17 de Agosto
GMT+2 CET


 MIRAR EL REPLAY
 MIRAR EL REPLAY
 MIRAR EL REPLAY
 Se estan actualizando los foros para poner link's
Esperenos!
Esperenos!
Grupos - Group Stage
Los dieciséis equipos se dividen en cuatro grupos de cuatro, y cada equipo juega un partido contra cada uno en su grupo. Los resultados de la fase de grupos se rellenará a los ganadores y perdedores soporte. Los dos primeros de cada grupo con el mejor ganado / pérdida récord en el avance de la fase de grupos en el soporte de los ganadores. Los dos equipos con el peor récord de ganados / pérdida en la fase de grupos se colocan en el grupo de los perdedores. Vínculos a la conclusión de la fase de grupos será decidido por el tiempo de la partida total de sus ganancias (menos es mejor).

GRUPO B
GRUPO C


GRUPO D


DotA 2 International Tournament at GamesCom 2011

DotA 2 International Tournament at GamesCom 2011. Did someone herad about this? A tournament, Yes guys!The Valve has announced for the event of DOTA 2 at GamesCom 2011. You can check the other sites for this page. A very exciting DotA 2 Tournament which is still happening in Cologne, Germany from 17 to 21 August. World's top 16 DotA teams was invited with this very huge event and competing to win a very huge amount of money.
Here is the press release from Valve:
“The International is the first public Dota 2 event and will give the tens of millions of gamers playing Dota around the world their first look at the new game,” said Gabe Newell, president and founder of Valve. “I have had the good fortune to watch the competitors as they prepare for the tournament, and level the of play is extraordinary.”
Saturday, August 20, 2011
Dota 2 Live Stream | Watch Dota 2 Tournamet Live Stream

Thursday, August 18, 2011
Dota 2 Hats for Team Fortress 2
TF2 Dota 2 Hats Revealed
Alert! Valve Corporation has Dota 2 hats for Team Fortress 2 players.
Radiant vs Dire goes RED vs BLUE in the special TF2 Promo Hats Dota 2 series.
TF2 hats for Dota 2
Clockwerk Hat

The Clockwerk hat is inspired by the Dire Strength hero, Clockwerk.

Storm Spirit Hat

The Storm Spirit Hat is inspired by the Radiant Intelligence hero, Storm Spirit.

Sniper Hat

The Sniper Hat is based upon the Radiant Agility hero, Sniper.

How to get the Dota 2 hats? We'll reveal them later.
In the meantime, sign up for the Dota 2 beta now.
Radiant vs Dire goes RED vs BLUE in the special TF2 Promo Hats Dota 2 series.
TF2 hats for Dota 2
Clockwerk Hat

The Clockwerk hat is inspired by the Dire Strength hero, Clockwerk.
Storm Spirit Hat

The Storm Spirit Hat is inspired by the Radiant Intelligence hero, Storm Spirit.
Sniper Hat

The Sniper Hat is based upon the Radiant Agility hero, Sniper.
How to get the Dota 2 hats? We'll reveal them later.
In the meantime, sign up for the Dota 2 beta now.
Tuesday, August 16, 2011
Akasha Item Build | DotA Queen of Pain Item Build, Guide and Strategy
Akasha Item Build - DotA Queen of Pain Item Build, Guide and Strategy. Akasha is one of the many souls claimed by the blade, Frostmourne. Raised to serve the Lich King as a Banshee, she wanted to become pure substance once more. Driving into the forest, he could conquer and have a lover Succubus. True bearing the title, Queen of Pain, she enjoys nothing more than inflicting massive damage his enemies, using the second toxic attack from the host himself and howling demon succubus withheld from her Banshee nature. Akasha breaks her enemies drum with torturing screams, some so loud they manifest into powerful waves that ripple in the ground, destroying all behind them.

Akasha – The Queen of Pain
Range: 550 | Move Speed: 300
Primary: INT
Str: 16 + 1.7 | Agi: 18 + 2 | Int: 24 + 2.5
Damage: 45 – 53 | HP: 454 | Mana: 312
HP Regen: 0.73 | Mana Regen: 0.97
Attack Speed: 0.69 | Armor: 2
Shadow Strike (D)
Throwing dagger poisonous large initial damage, and then destroy the agreement from time to time. Poisoned unit has a movement speed slowed for a short time. Slow quantity increases per level.
Level 10-50 strike damage, 30 duration damage. Slow initial 20%.
Level 20-70 strike damage, 40 duration damage. Slow initial 30%.
Level 3-70 strike damage, 50 duration damage. Slow initial 40%.
Level 4-100 strike damage, 60 duration damage. Slow initial 50%.
• Damage type: magic
• The term of the damage dealt to units affected every 3 seconds for 15 seconds.
• Affected units slowly return the original movement speed every second for 15 seconds.
• The unit suffered by Shadow Strike be denied by those allies when their HP drops below 25% of maximum health.
Mana Cost: 80/100/120/140
Cooldown: 20/16/12/8 seconds
Blink (B)
Short distance teleportation that allows one to move in and out of battle.
Level Range 100-700.
Level Range 2-850.
Level Range 3000-1000.
Level Range 4-1150.
• Most of the projectiles can be avoided if Blink is used before they collided.
• If the target is more distant from the maximum distance, Akasha will teleport only 80% of the maximum distance.
Mana Cost: 60
Cooldown: 12/10/8/6 seconds
Scream of Pain (F)
Queen of Pain lets loose piercing scream, damaging nearby enemies.
Level 1-85 damage per target.
Level 2-165 damage per target.
Level 3-225 damage per target.
Level 4-300 damage per target.
• Damage type: magic
• The unit is not visible by Akasha will not be affected, even if they are within range of skills
• Area of ??Effect: 425/450/475/500
Mana Cost: 110/120/130/140
Cooldown: 7 seconds
Sonic Wave (W)
Making a giant wave sound of heavy damage to all units on line.
Level 1 – 290 (340 *) damage
Level 2-430 (530 *) damage
Level 3 – 600 (725 *) damage
Mana Cost: 250/360/500
Rest: 135 (100/70/40 *)
• Damage type: magic
• Can be upgraded with a stick Aghanim’s (* indicates the value added).
Warlock Item Build | DotA Demnok Lannik Item Build, Guide and Strategy
Warlock Item Build - DotA Demnok Lannik Item Build, Guide and Strategy. Warlock is a great baby sitter for your team carry. But he also has great offensive power with his Infernal. This guide will share the build and strategy with Demnok Lannik the Warlock.

Former cultist of the Blacksun, Lannik was among the first of many orcs enslaved by the wretched demons when the Legion’s taint befell the lands of Kalimdor – a dire affliction that grew stronger over the years. Mannoroth’s sudden and unexpected demise severed this Warlock’s ties to demonology, and the absence of its corrupting influenced caused his body to wither onto the verge of death. In exchange for life beyond the grave, he bound a pact with the Lich King.
Strength 18 + 2.5
Agility 10 + 1
Intelligence 24 + 2.7
Affiliation: Scourge
Base Damage: 46 – 56
Base Armor: 2.4
Movespeed: 295
Attack Range: 600
Sight Range: 1800 / 800
Warlock Skills
Fatal Bonds
Bonds up to 5 enemy units together, causing damage dealt to any of them to be partially felt by the others.
120 mana cost, 30 seconds cooldown, 25 seconds duration, casting range of 600. The distance between each bounce may not be over 600.
Bonded units share 3.75/7.50/11.25/15.00 percentage of damage taken.
The damage is triggered HP removal which is not reduced by anything, blocked by spell immunity and not evaded by pseudo-evasion. Damage will not disable abilities or items like Kelen’s Dagger which requires player based damage.
Usage: One of the reasons why you are so scary, this skill allows you to dominate in team fights and to surprise your enemies by amplifying your team’s AoE potential. You can as well use it for clearing up waves faster, but that’s rarer as you should be keeping it for the heroes. In teamfights, try to aim on a hero, to assure that it bounces to other heroes too instead of onto creeps.
Shadow Word
A single word causes powerful magics to envelop the target. Creates a healing mechanism on a friendly target or damages an unfriendly one. Does not dispel on attack.
90/110/130/150 mana cost, 24 seconds cooldown, 8 seconds duration, casting range of 500. Heals or damages target for 10/20/30/40 per second.
Deals Magical damage which is reduced by the target’s Spell Resistance and is blocked by Spell Immunity. A hero affected by Shadow Word may be denied once it falls below 25% of its maximum health.
Usage: Your number one laning ability. With this you can stay alive even against the nastiest couples or can send back soloers inferior to your hero or your skill level. If you are in a really bad situation you may eat a tango next to using this skill and heal an insane amount of health points in a matter of just 8 seconds. Good for finishing off fleeing heroes or boosting your Infernal’s survivalability.
Upheaval
Stirs up inert magic in a target area, channeling the force into a powerful slowing current that grows more powerful with every passing second it’s channeled. Can channel up to 10 seconds and up to 84% slow.
100/110/120/130 mana cost, 20 seconds cooldown, duration 3 seconds, channel time 10 seconds, casting range of 700 and 650 AoE. Slows by 7/14/21/28 percentage per second up till 84%.
Does not slow units with Spell Immunity. Slow amount is calculating with duration of channel, not with how long enemy was in area of effect.
Usage: A skill that still so many people don’t know how to use properly… not even the pros and not even me I have to admit. I have seen only two players so far in my life to use it to great ownage, but no one else before or ever after. I think it has great potentials, that people have to find out and I’m sure we will see it being used in the futured (that’s also another reason why I’m posting this guide in the main strategy instead of the scourge guides section, so that we can discuss upheavel usage). What I saw before is infernal being dropped down, someone disabling the target or an AoE disable being used and meanwhile the Warlock casting Upheavel. This can be deadly, 80% of slow is already too much for the most not to mention the slower heroes like Rhasta or Techies.
Rain of Chaos (Ultimate)
Calls an Infernal down from the sky, dealing 100 damage and stunning nearby enemies for 1 second. The Infernal lasts 60 seconds, takes reduced damage from spells, has Permanent Immolation and a chance to Pulverize an area on attack.
Gold bounty 100/150/200, Experience Gain 98. The Infernal has 33% Spell Resistance and since the Infernal has 33% Spell Resistance and 25% Spell Resistance from its Hero-type armor, it has a total of: 49.75%.
Usage: your lil’ flaming baby. This little monster will cause fear and havoc amongst the rows of your enemies. As I’m already going to focus a lot on this fire golem a lot below I am not writing anything else here.
Infernal Skils
Flaming Fists
Gives Infernal a 40% chance that an attack will deal 75/115/150 bonus damage to nearby units. 300 full damage AoE and 350 half-damage AoE.
Permanent Immolation
Burns Infernal’s nearby enemy units for a certain amount of 20/30/40 damage per second.
Resistant Skin
Reduces the duration of negative spells and renders the Infernal immune to certain spells.
Warlock Skill Build
Solo
Level 1 – Shadow Word
Level 2 – Stats
Level 3 – Shadow Word
Level 4 – Stats
Level 5 – Shadow Word
Level 6 – Rain of Chaos
Level 7 – Shadow Word
Level 8 – 10 – Fatal Bonds
Level 11 – Rain of Chaos
Level 12 – Fatal Bonds
Level 13 – 15 – Fatal bonds
Level 16 – Infernal
Level 17 – 21 – Stats
Level 22 – 25 – Upheaval
Babysitter
Level 1 – Shadow Word
Level 2 – Fatal Bonds
Level 3 – Shadow Word
Level 4 – Fatal Bonds
Level 5 – Shadow Word
Level 6 – Rain of Chaos
Level 7 – Shadow Word
Level 8 – 9 – Fatal Bonds
Level 10 – Stats/Upheaval
Level 11 – Rain of Chaos
Level 12 – 14 Stats/Upheaval
Level 15 – Stats
Level 16 – Infernal
Level 17 – 21 – Stats
Level 22 – 25 – Upheaval/Stats
I don’t really think that the skill build generally needs an explanation, Shadow Word and Rain of Chaos are rather obvious choices at their respective levels. But I am sad to see that several people are still stuck with the old Warlock builds getting Attribute Bonuses at the early levels… which is not bad if you are soloing and lack the power to dominate. But in a dual a lane and if you buy some circlets, Fatal Bonds will need to be leveled earlier, as you need it for team fights even in smaller ones.
Now comes Upheavel. Why even get it, noone uses it? And you are right, noone uses it, or barely anyone. But this is something WE have to change. I have seen some people use it properly and it was devastating. I could even see it being leveled instead of Bonds in early game for a gank-oriented Warlock, but I’m not sure if that works too well (it is definitely surprising though). So I’m not justifying this skill, but am challenging everyone else to justifiy it for all the DotA players.
Warlock Item Builds
Core Item
Luxury Items
(most versatile build fitting any level of game)
(clanwars, mid-high level IH games | ward/fighter, anti-invis)
(public games | carry build)
(public games | owning with infernals)
(clanwars | supporter, ward bitch)
Justifications
Warlock doesn’t need much items to be useful for his team, that’s why the Basilius+Mekansm build is getting so popular. And that’s why the core build is RoB+BoS. A Sobi Mask will cover all your mana needs in early game you can even start with the sobi plus some tangos and branches if you like, but the hero generally isn’t that mana dependent, just try to play wisely not spamming Shadow Word. The armor aura from RoB is quite useful at pushes and boosts your Infernal’s EHP even further. Of course some circlets or even Bracers can do well, but you can decide it on how well you can survive.
The oldest build existing is the dual/infernal spitting machine build aka Refresher Orb. In that build having (additional) slow is always useful, that’s why I advocate building your Shiva’s Guard or Eye of Skadi afterwards. The slow allows your infernal to hit more, while the immolation can burn the souls of your target for greater good. Use it in pubs preferably or when your opponents “mass” diffusal blades against you… though other builds would still be prefered in such games.
Guinsoo’s Scythe of Vyse is one of the strongest INT items in the game giving you a powerful disable namely Hex. It gives you decent DPS as well and allows you to spam your spells. It’s no doubt that the Sheep Stick is the best possible choice you can get, only some game circumstances may force you to switch to another build.
Necronomicon should be none-brainer. If you have to take the lead in ward-fight, this book will help you greatly along with massing wards yourself, allowing all your other heroes spend their gold on their needed items. The Mekansm build’s justication could go here as well, it’s also about being the ward/bitch but not much need for clearing wards, more like healing your allies all the time and pushing early to mid game. It’s for the faster games.
As Demnok Lannik has a high base damage, nice animation and an ability to bond heroes together, damage amplification could work out pretty well for him. If you are too tired, have a high delay in the game or just simply drank too much beer then this build can work really well. You don’t need much micro, just hit and run. That’s why the Deso+Cuirass build works so well for carrying public your games. For Power Treads, always set it to STR, as you need the HP much more than mana or AGI.
Alternative/Situational Items
Shiva’s Guard – best used in AoE based teams. It is a pretty good item for countering your opposing carry heroes and increasing the AoE damage potential of your team and slowing fleeing heroes.
Orchid Malovalence – pretty obvious choice for INT carries. Nice amplification of damage and silence along with high attack speed… get it as second or third DPS item if you are farmed.
Black King Bar – obviously when you are being a carry hero who needs to stay close but needs to counter the massive amount of nukes and disables. Could work out even when you are not carry, but then you should be trying to stay behind more.
Warlock Techniques
Shadow Harass – use your Shadow Word offensively whenever you take advantage in denying and in physical harass. What’s very important is always knowing when to use it offensively and when defensively. Typically pub gamers will not harass you too much, so against them use it most of the times.
Unkillable Word – this is the defensive usage of your second skill. And actually the hardcore one, when you are being ganked and need high regen. Eat a tree with a tango and cast Shadow Word on yourself. You will have a sick HP regen and if you are at least level 6 then you might as well throw your little baby to give some further more surprise.
Weather Control Device – rain of chaos, your firey potion. It is extremely important to learn when to cast your Infernal and when to rather keep it. It decides the outcome of a team fight or a flee/killing of a ganked hero several times during a game. Try to wait for your teammates to ALL of your teammates to come at least 1000 or 1500 range of you (dagger users are in advance) before you initiate. It happens many times that you drop your baby, but your allies are not around to continue the disabling you started and to pull out as much nukes and physical attacks as possible. If you screw up, then you will simply warn your opponents to back up…
Proper Bonding – …also note, that Fatal Bonds should be cast only after Rain of Chaos, and immediately after it. Most of the times you won’t be able to bond your opponents without getting disabled yourself, so you need that 1 second. But if you fail to link them together immediately, then most of your allies’ spells’ damage won’t be increased. And as I stated before, always click on a hero to ensure that the next target’s priority will be a hero as well.
Warlock Strategies
Soloing – this is recommended, when your team has two strong dual lanes or no better solos than you. Solo Warlock used to be a popular strategy but now it’s just as common if not less than dual lane. If you are up against a weaker solo, try to harass the shit out of him while getting as much denies in as possible. This will ensure that you can take the lead and concentrate on farming more later on. If you are up against a similarly strong soloer like Shadow Fiend or Viper, then try to slowly find out what the playstyle of the player is and if he is too defensive, then go offensive, if he is agressive, then use Word mainly on yourself harassing with physical attacks only. In that case you need to wait until he becomes too confident and makes a mistake. You might need to eat a tango or even casting your Infernal, just make sure, you make a balance between the Word heal and the Tango heal, so you keep enough mana for Rain of Chaos.
Laning – currently babysitting is quite popular for Warlock similarly to the Shadow Priest’s role. Void, Spectre, Rikimaru, Mortred… any hero who needs a little help at the beginning might become your partner in the lane. Concentrate on harassing and denying all the time. Don’t forget that the key is getting your carry hero farmed up as early as possible and for that you need to let all the creeps for him. Buy several tangos (no basilius at start) so that you can eat tress for your own health and keep all the Shadow Words to heal your partner. When you are paired up with a strong laner, then you should be on the offensive, being as agressive as possible. Your key to victory is dominance, so try to dominate your lane and get some levels of advantage.
Getting ganked – as described before, eating a tree with a tango and casting Word on yourself will help you a lot (similar effects to Enchantress’ healing). If you face a Viper in lane then holding a tp scroll all the time is necessary. Casting Infernal might turn the tides, if they run up to you under the tower. Also, start pinging on the map immediately, if you are not close enough to the tower, but not far either. Call an ally or two, so you can countergank immediately.
Ganking – when your allies call for a gank, make sure you come with enough mana to cover a word+infernal or even a word+infernal+bond combo (if there are creeps or more enemy heroes around). They of your success is when to drop down your little baby as I mentioned before. It doesn’t need practise at all, it demands calmness and coldness. So be patient and cast Rain of Chaos when you are sure your allies can catch up and disable at least one of the targets. Also try to either heal your tanking ally or damage a fleeing target with Shadow Word. Always drop the Infernal behind your enemies, so they either get hit more times and blocked a bit or get hit by your own allies if they go the other way.
Agressive playstyle – is about pushnig and ganking a lot. Preferable if you have allies such as Keeper of the Light, Pugna, Earthshaker, Leshrac, Lina, Chen, Broodmother, Soul Keeper or Visage. Try to decide the game in mid game already by taking out all the outer towers and then pushing down one of the inner towers and later the raxes. In this case you will need AoE powers for clearing waves fast and to kill all or most heroes in a team collision. You will also need a Mekansm an Arcane Ring and a Necronomicon for even better results (that’s when the Necro Build or the Support Build comes in).
Defensive situations – this is when you have to be even more cautious. When you are on the defense, then you are forced to play a style that you were not expected to play as a team that wants to win always considers a game to be theirs. But of course you cannot always win, and that’s when you have to be creative. This is a bit difficult for you as you don’t really have any spells to clear creep waves, so you have to wait for your nuking allies to do this job. However you shouldn’t be sleeping because you need to wait for the time your opponents are initiating. Try to predict wether it’s a false or real initiation as the wiser teams will try to get you cast the Infernal before the real attack. If it’s clearly a real attack, then drop down your baby immediately, cast bonds and scream sparta then hit everyone and anyone you can. These are the times when massing Bracers and buying Power Treads instead of a Boots of Travel might be a better choice. this is of course up to your descration.
Subscribe to:
Posts (Atom)
Featured Post

Popular Posts
-
50% OFF Men handkerchief cotton 100% /concise style printed 45cm/Many Uses Price : US $10.27 / piece Price after discount : US $10.27 ...
-
 Garena Master v46 | Download Garena Master v.46 MapHack | Garena Master MapHack Download. The latest version of GarenaMaster – GarenaM4ST3R ...
 -
 DotA IMBA 3.77b AI EN Map is another addition within the huge database of DotA primarily based fun-mode maps. The term imba comes from "...
